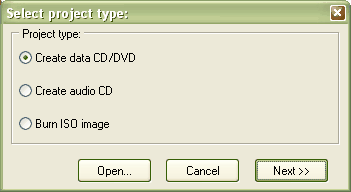
Before you start making the autorun program, you should finish your CD layout (Create Data-CD/DVD) so that you can link the buttons with programs, files etc.
In the upcoming window click on "Autorun" and a wizard will help you to create an autostart-menu. You can download additional themes at http://www.cd-burning-stuff.com.
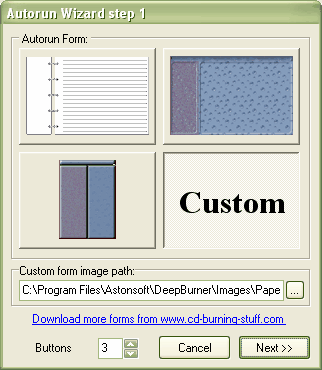
At first you have to choose the autorun form. Click on one of the images to use a predefined form or click on custom and then on "..." to use your own (or one of http://www.cd-burning-stuff.com) form. With "Buttons" you can choose number of buttons that you want to insert. Of course you can also add buttons later. Now click next.
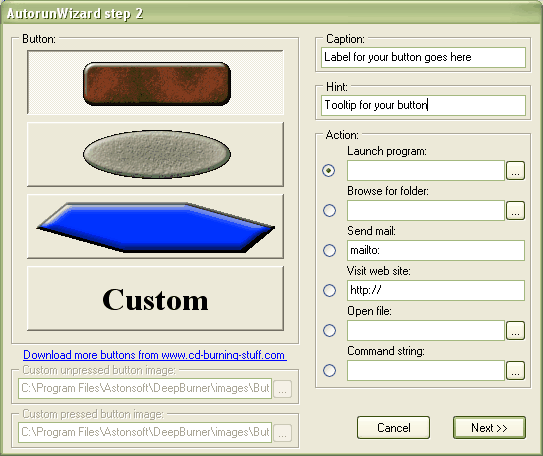
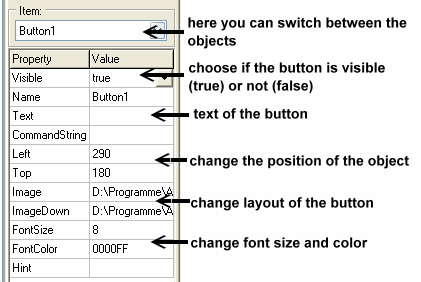
In the next step you can create your buttons. This step will appear for every button you wanted to have in step 1. You can choose a predefined or custom button same way as you could in the step before.
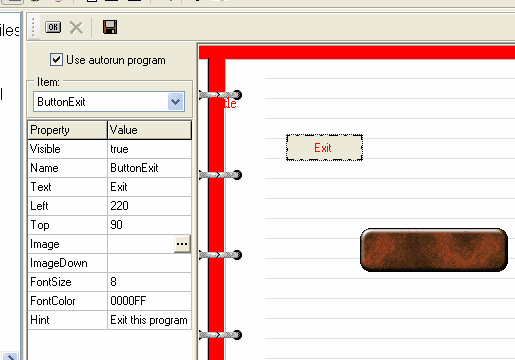
Now you should give the "Exit"-button a layout. For that select it and click on the value for "image" and "imagedown" to choose the button image with the "..."-button.
You can move your buttons with the mouse and edit them with the table on the right. When you deactivate "Use autorun program" the CD won't get an autostart-menu and you can't edit it (until you activate it again). With the "OK" Button you can insert further buttons.
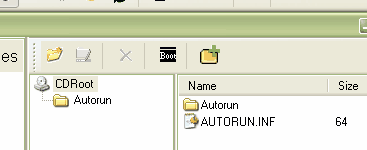
The save-button lets you save your autorun-menu somewhere, so you don't have to make it again if you want to use it multiple times. However, you can't edit your saved autorun-files.
If you want to place your saved autorun on the CD, just drag and drop them to your layout like this.
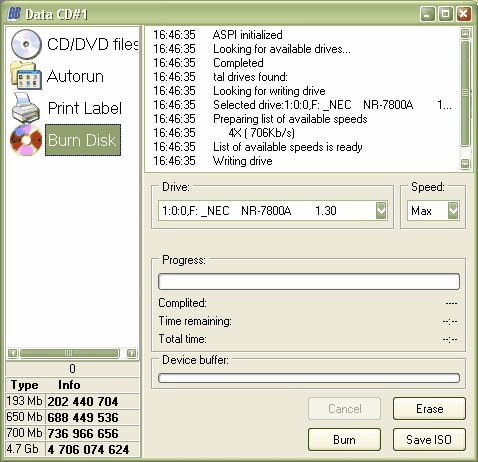
When you have finished, just click on "Burn Disk" and "Burn".